引述:
制作完世界时钟之后,最终还是要回归本心。我们发现,和之前的电子作品一样,OLED模块的拓展使用会用到不同相关的软件库,这些软件库的使用是丰富了OLED的实用范围,使得我们制作的电子产品也更加的多样化,在生活中的使用范围也更加广泛。这同时也推动了我们了解电子世界的进程,现在的你,应该对电子世界有一个大概的轮廓了吧。
同理,其他模块的使用也和本次分享的引述一样,拥有更大的发展潜力,这就取决于我们作为开发者的想象力了。
接下来,我们继续分享学习。
本次分享则继续在零知ESP8266上使用OLED,加深我们对OLED模块的认识。
一、硬件
电脑,windows系统
零知ESP8266开发板
OLED SSD1306模块
micro-usb线
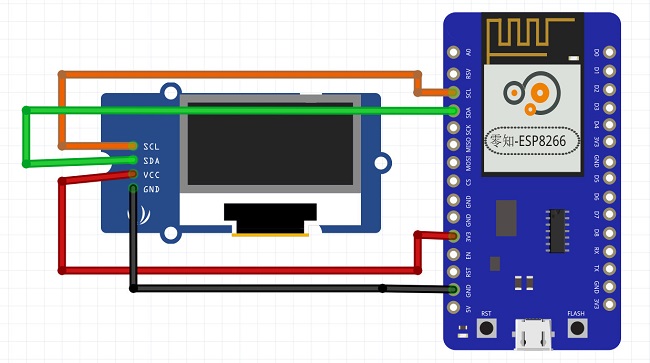
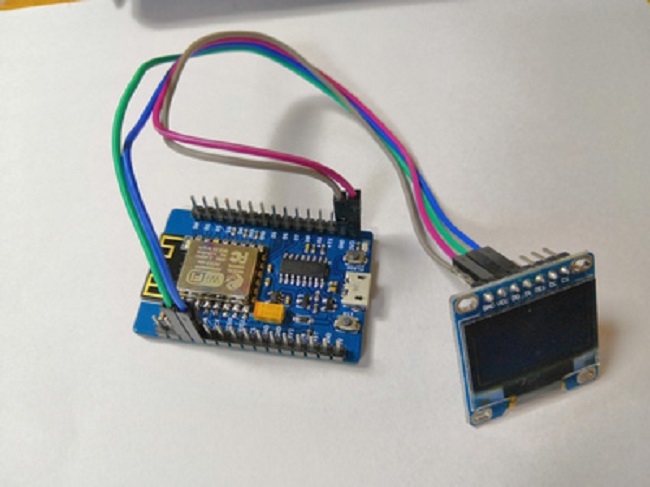
二、连线


三、软件库
(1)本次使用了OLED相关的软件库,因此需要安装如下两个库:
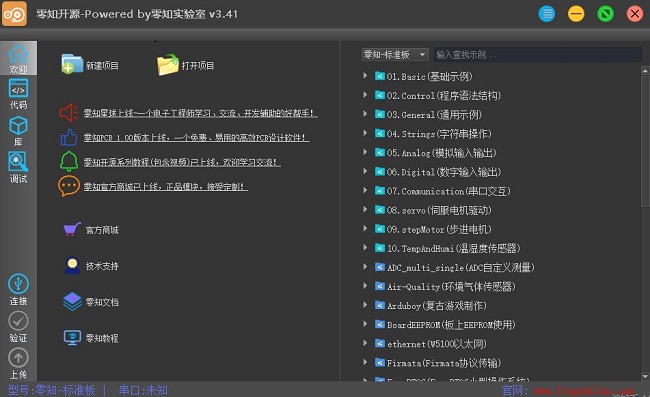
Tip:如果你的电脑已在零知实验室“软件下载”处安装了最新的零知开发工具(如下图),即可跳过此步骤。

1. Adafruit_SSD1306
2. Adafruit-GFX
(2)安装
在零知实验室官网搜索:本地库,即可安装。
同时也可以给我留言,我们一起交流学习。
(3)烧录程序
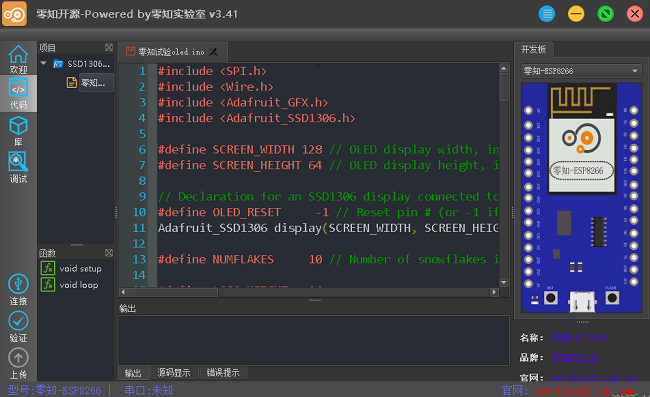
在这里我们选中SSD1306的示例即可。

其完整代码如下:
- <font size="3">#include <SPI.h>
- #include <Wire.h>
- #include <Adafruit_GFX.h>
- #include <Adafruit_SSD1306.h>
-
- #define SCREEN_WIDTH 128 // OLED display width, in pixels
- #define SCREEN_HEIGHT 64 // OLED display height, in pixels
-
- // Declaration for an SSD1306 display connected to I2C (SDA, SCL pins)
- #define OLED_RESET -1 // Reset pin # (or -1 if sharing Arduino reset pin)
- Adafruit_SSD1306 display(SCREEN_WIDTH, SCREEN_HEIGHT, &Wire, OLED_RESET);
-
- #define NUMFLAKES 10 // Number of snowflakes in the animation example
-
- #define LOGO_HEIGHT 16
- #define LOGO_WIDTH 16
- static const unsigned char PROGMEM logo_bmp[] =
- { B00000000, B11000000,
- B00000001, B11000000,
- B00000001, B11000000,
- B00000011, B11100000,
- B11110011, B11100000,
- B11111110, B11111000,
- B01111110, B11111111,
- B00110011, B10011111,
- B00011111, B11111100,
- B00001101, B01110000,
- B00011011, B10100000,
- B00111111, B11100000,
- B00111111, B11110000,
- B01111100, B11110000,
- B01110000, B01110000,
- B00000000, B00110000 };
-
- void setup() {
- Serial.begin(9600);//设置打印波特率
-
- Serial.println("SSD1306 i2c example");
-
- // SSD1306_SWITCHCAPVCC = generate display voltage from 3.3V internally
- if(!display.begin(SSD1306_SWITCHCAPVCC, 0x3c)) { // Address 0x3D for 128x64
- Serial.println(F("SSD1306 allocation failed"));
- for(;;); // Don't proceed, loop forever
- }
-
- // Show initial display buffer contents on the screen --
- // the library initializes this with an Adafruit splash screen.
- display.display();
- delay(2000); // Pause for 2 seconds
-
- // Clear the buffer
- display.clearDisplay();
-
- // Draw a single pixel in white
- display.drawPixel(10, 10, WHITE);
-
- // Show the display buffer on the screen. You MUST call display() after
- // drawing commands to make them visible on screen!
- display.display();
- delay(2000);
- // display.display() is NOT necessary after every single drawing command,
- // unless that's what you want...rather, you can batch up a bunch of
- // drawing operations and then update the screen all at once by calling
- // display.display(). These examples demonstrate both approaches...
-
- testdrawline(); // Draw many lines
-
- testdrawrect(); // Draw rectangles (outlines)
-
- testfillrect(); // Draw rectangles (filled)
-
- testdrawcircle(); // Draw circles (outlines)
-
- testfillcircle(); // Draw circles (filled)
-
- testdrawroundrect(); // Draw rounded rectangles (outlines)
-
- testfillroundrect(); // Draw rounded rectangles (filled)
-
- testdrawtriangle(); // Draw triangles (outlines)
-
- testfilltriangle(); // Draw triangles (filled)
-
- testdrawchar(); // Draw characters of the default font
-
- testdrawstyles(); // Draw 'stylized' characters
-
- testscrolltext(); // Draw scrolling text
-
- testdrawbitmap(); // Draw a small bitmap image
-
- // Invert and restore display, pausing in-between
- display.invertDisplay(true);
- delay(1000);
- display.invertDisplay(false);
- delay(1000);
-
- testanimate(logo_bmp, LOGO_WIDTH, LOGO_HEIGHT); // Animate bitmaps
- }
-
- void loop() {
- }
- </font>
(4)验证代码,并且上传
四、结果
效果视频:亲自实现是极好的,小主
演示效果极佳,快来动手试试吧! |